
Plan the set-out
Check pattern direction, offsets, joints, centerlines, perimeter cuts, and narrow edge conditions before material is cut.
Plan plank and tile layouts before you order or start on site. Draw the room, enter the product, set the pattern, and review quantities, cuts, waste, surplus, and material cost from the generated layout.
Review set-out, purchasing quantities and job documentation while there is still time to change the plan.
Check pattern direction, offsets, joints, centerlines, perimeter cuts, and narrow edge conditions before material is cut.
Review pieces, boxes or packs, cuts, waste, surplus, and material cost derived from the generated layout.
Generate a Layout Report for client review, ordering, or as a clear site reference.
Use the same layout process for straightforward rooms, irregular spaces, and multi-area projects.
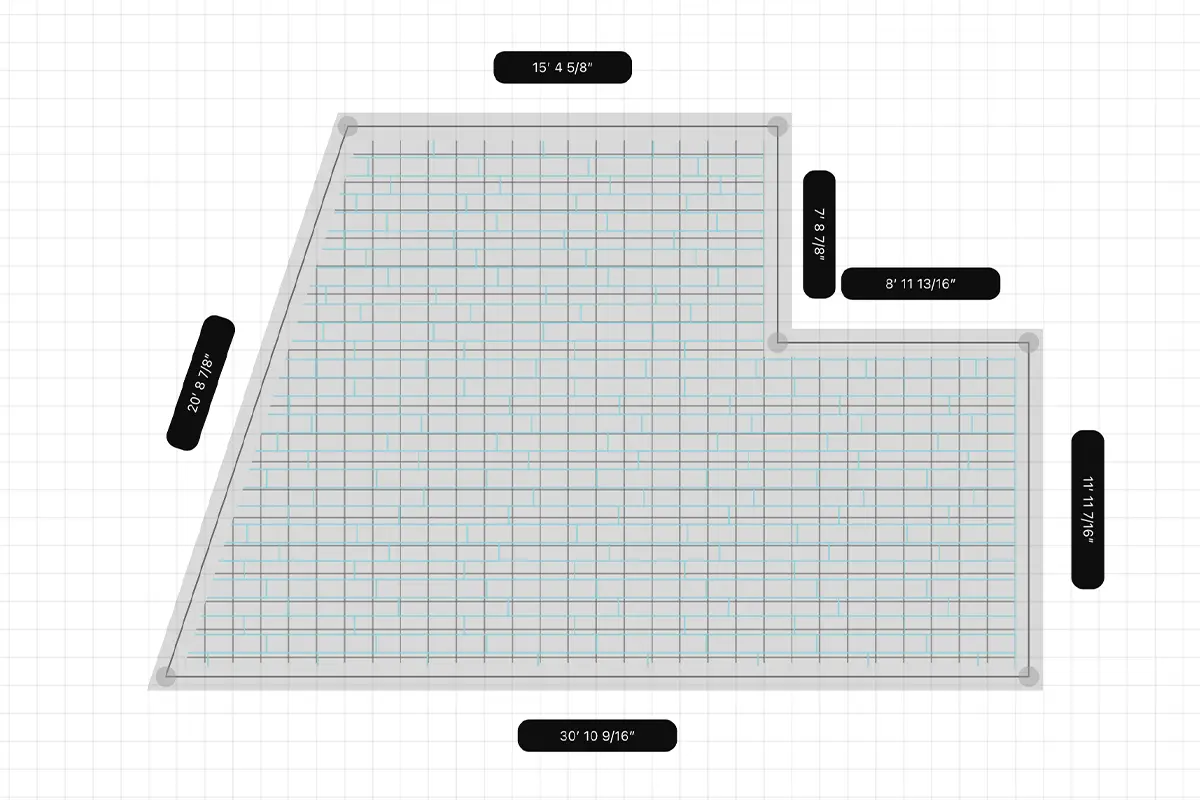
Start with a preset or draw the floor outline, including corners, cutouts, and other areas that change the layout.
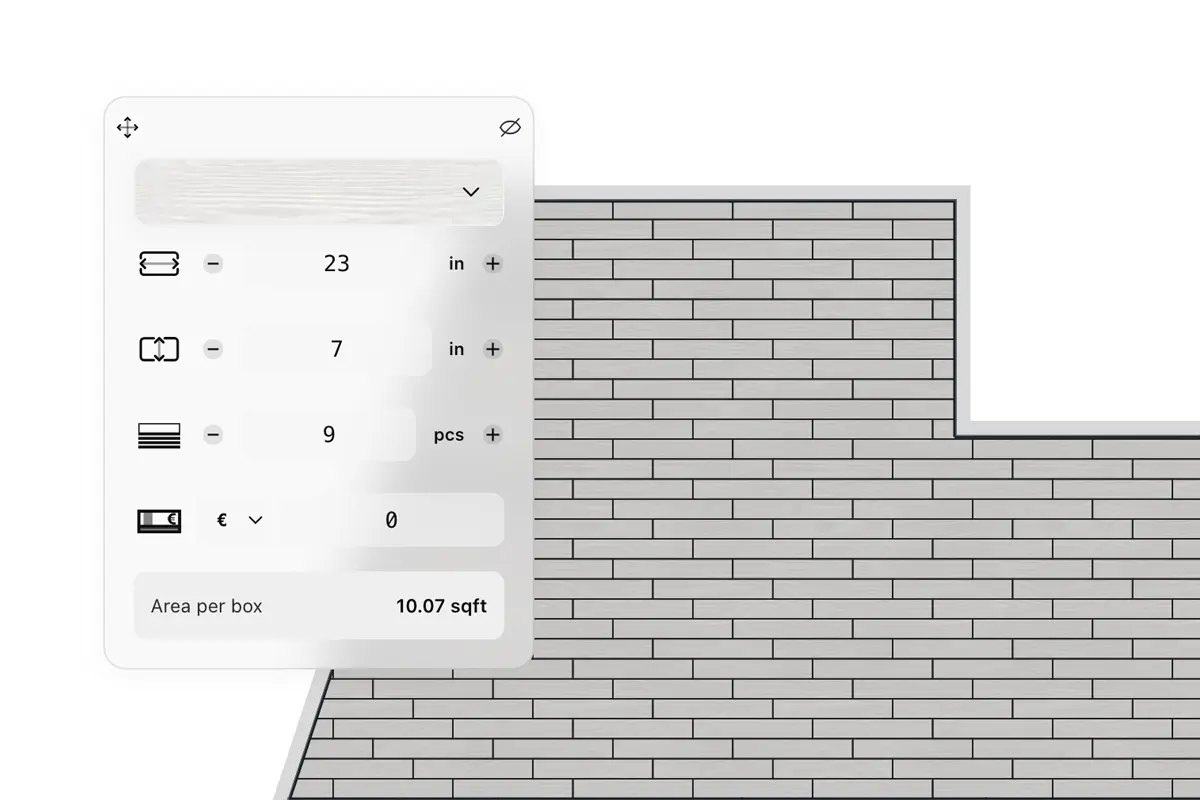
Set plank or tile dimensions, pieces per box, product price, spacing, and the other inputs needed for that material.
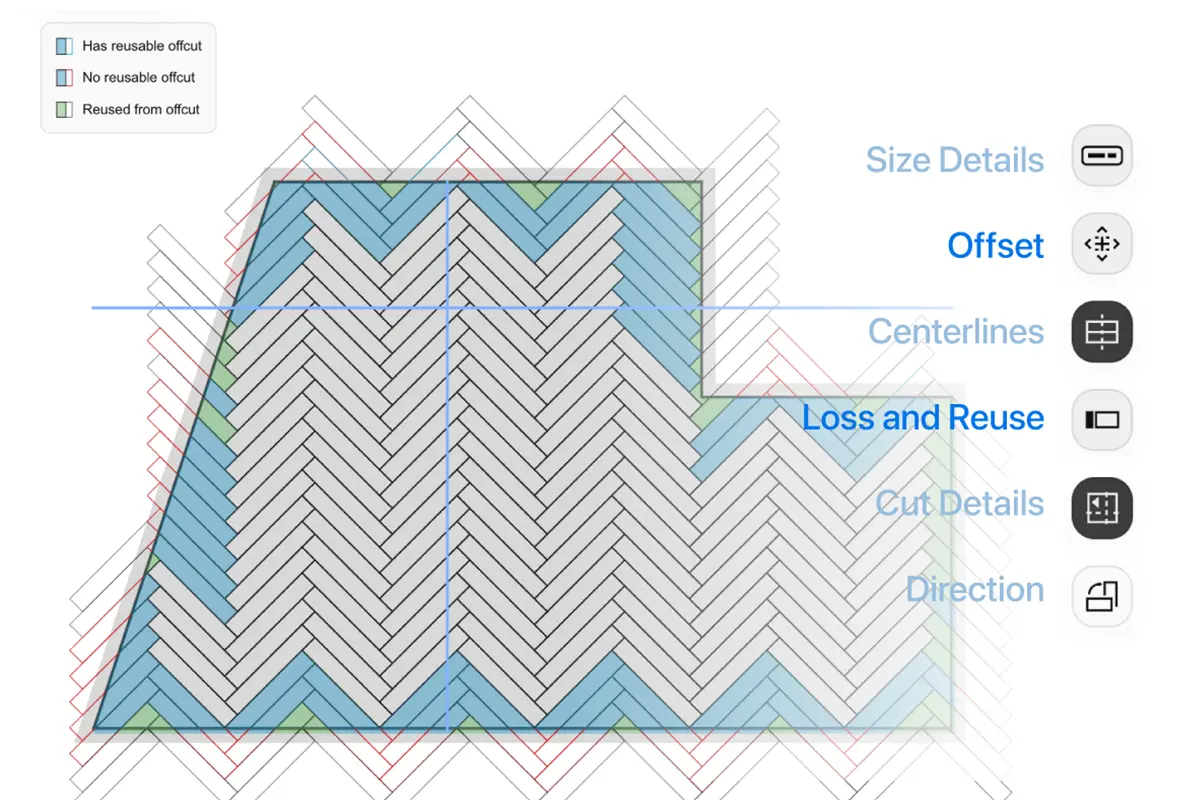
Choose the layout and test direction, offset, stagger, joints, and centerline position against the actual room shape.
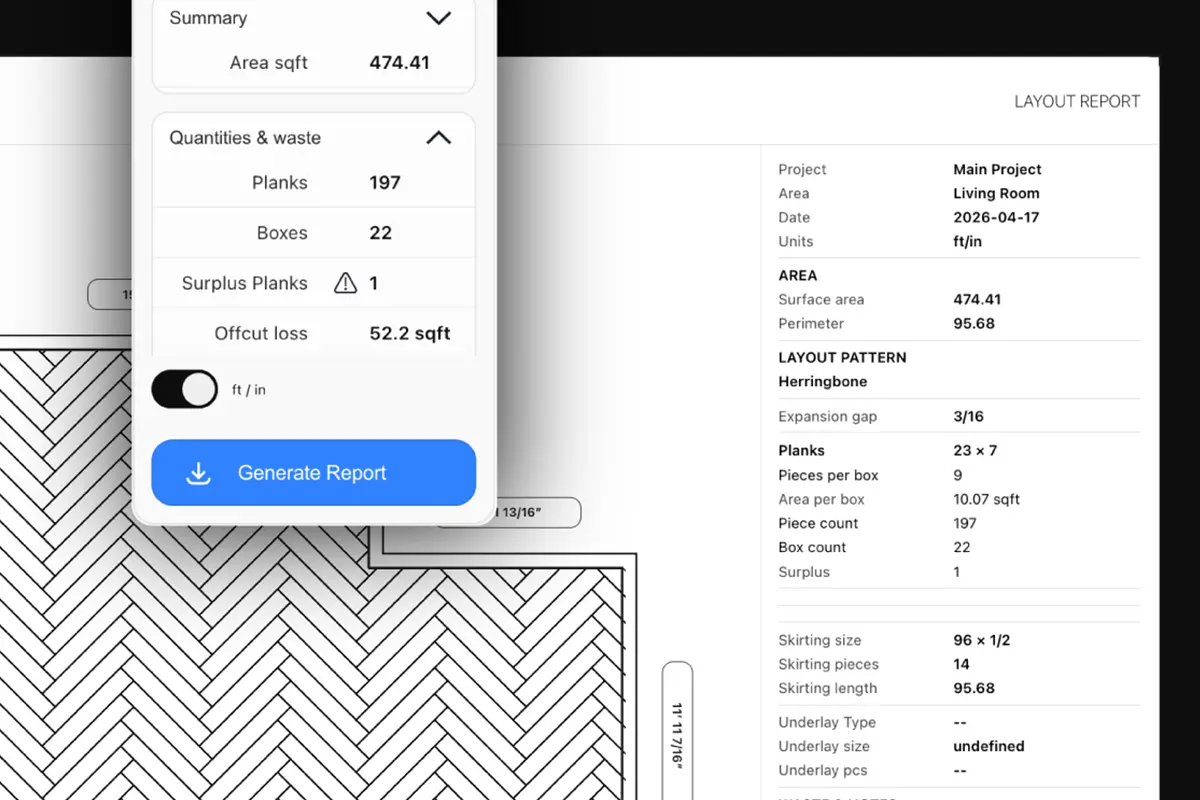
Check the visual layout and its material output together, then save the project or generate a report when you need to return to or share the plan.
Use material-specific layout controls without splitting the job across separate tools.
Plan laminate, LVP, engineered wood, hardwood, herringbone, and other supported plank layouts with stagger, direction, centerline, cut, underlay, and baseboard outputs.
Plan square, rectangular, and supported hex tile layouts with joint spacing, pattern, direction, cuts, box quantities, adhesive, grout, and cost outputs.
CalcuFloor keeps the floor geometry, layout, quantities, and material cost connected. Use your normal business workflow for labor, overhead, scheduling, and the final quote.
Verify dimensions, substrate conditions, expansion requirements, manufacturer instructions, and the final ordering allowance before installation.
The layout makes the material result visible, so you can inspect where cuts and quantities come from before relying on the output.
Open the software without an account, or choose the paid workflow for saved projects and Layout Reports.